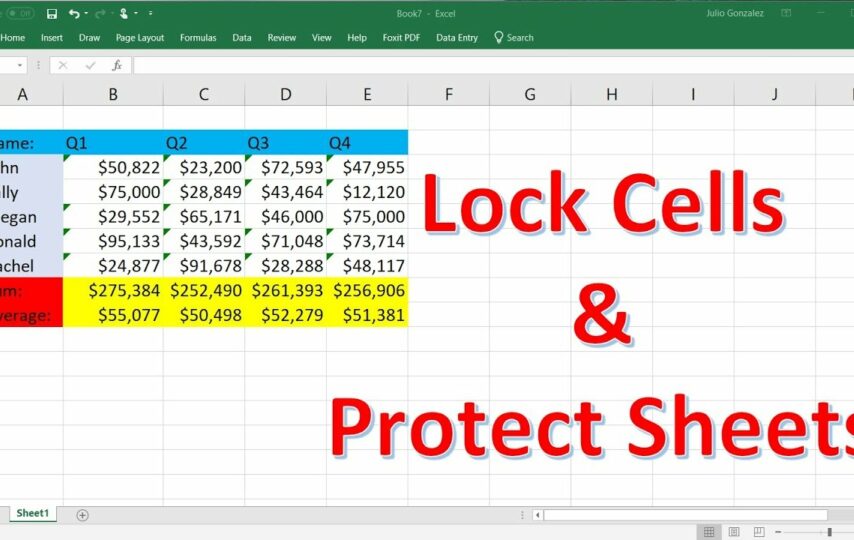
Microsoft Excel stands as one of the most widely embraced and user-friendly software applications. Developed by Microsoft, it empowers users to efficiently arrange and format data within a grid of rows and columns. In the subsequent sections of this article, we will delve into the process of cell locking in Excel. We will also discuss the steps to safeguard these locked cells with a password.
After putting in considerable effort into creating your spreadsheet, you want to ensure that anyone you share it with doesn’t accidentally alter important cells. Therefore, understanding how to lock cells in Excel becomes crucial. Fortunately, Microsoft Excel provides the functionality to lock or protect cells, preventing unintended modifications.
Whether you intend to lock all cells on a worksheet or specific ones, allowing flexibility for certain parts of the spreadsheet, this article will guide you on how to achieve that in Excel.
Locking All Cells in an Excel Worksheet

Image credit- laptopmag.com
In its default state, when cells are protected within a sheet or workbook, all the cells are automatically set to a locked status. This essentially means that they cannot undergo reformatting or deletion, and the content within them remains uneditable. It’s worth noting that by default, users can select these locked cells. However, you can change that in the protection settings.
Here’s a simple guide on how to protect cells in Excel:
Go to the Review tab.
Select “Protect Sheet.”
Here, you have the option to set a password. You can use a password to unprotect the sheet (optional) and specify the actions you want to permit for users.
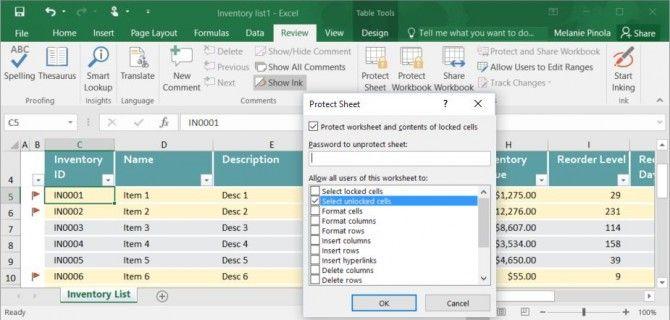
Image credit- laptopmag.com
Click “OK” to initiate the sheet protection.
If someone tries to edit any of the locked cells, a prompt will appear. It will display the following message: “The cells can only be unlocked when the sheet is unprotected.”

Image credit- laptopmag.com
To unprotect the sheet and enable editing of locked cells, navigate to the Review tab once again. Then, choose “Unprotect Sheet,” and input the password if prompted.
How to Protect Individual Cells in an Excel Worksheet
In specific situations, you may need to restrict changes to particular cells while permitting users to modify others within a worksheet. For instance, in an inventory list, you might want users to update unit prices and stock quantities while keeping item IDs, names, or descriptions unchanged. By default, all cells are locked when you protect the sheet. However, you can individually determine whether you want to lock a cell through its format properties.
Here are the steps to unlock specific cells even if the protection mode is on on the sheet:
Highlight all cells that you want to remain editable.
Right-click on the selected cells, choose “Format Cells,” and go to the Protection tab. (Alternatively, go to the Home tab and click the expansion icon next to Alignment. Then, navigate to the Protection tab in the Format Cells window.)
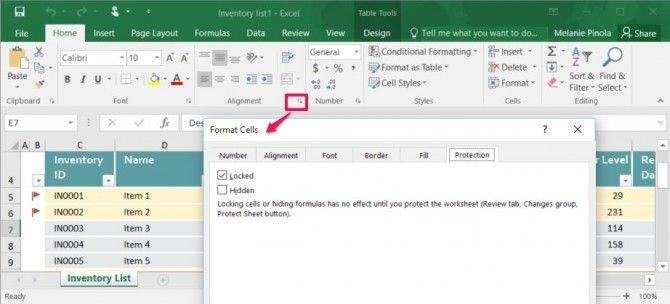
Image credit- laptopmag.com
Deselect “Locked” (which is selected by default) and click OK.
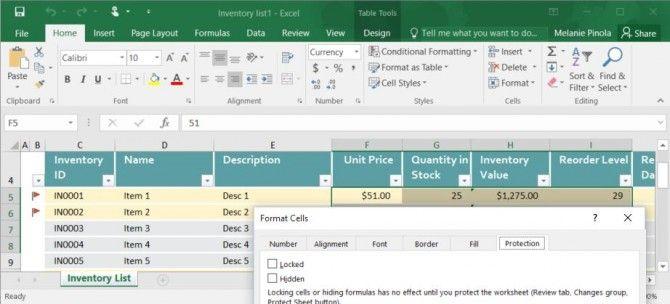
Image credit- laptopmag.com
Proceed to the Review tab, select “Protect Sheet,” and click OK to protect the sheet. Cells not unlocked in the Format Cells step (step 3 above) will be locked. However, the unlocked cells will remain editable.
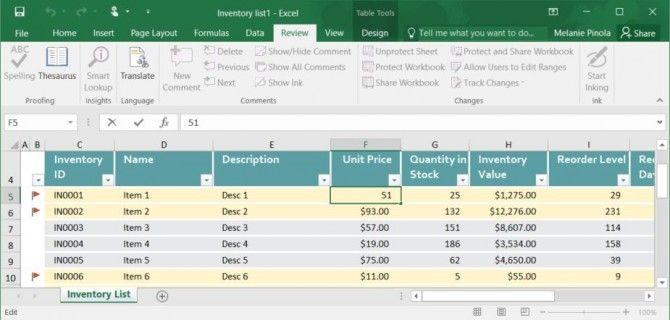
Image credit- laptopmag.com
It’s important to note that the locking or unlocking of specific cells won’t happen until you proceed with step 4. Note that the mentioned step involves protecting the sheet.
For a quick way to lock or unlock non-adjacent cells, you can utilize a keyboard shortcut. After selecting a particular cell or group of cells, follow the steps outlined above using the Format Cells dialog to lock or unlock them. Subsequently, select the next cell(s) and press F4 to repeat your last action.
Conclusion: How To Lock Cells In Excel
In conclusion, mastering the skill of locking cells in Excel is a fundamental aspect of ensuring data integrity and security within your spreadsheets. This comprehensive guide has provided a step-by-step walkthrough, enlightening you on the process of protecting specific cells while allowing necessary modifications to others.
By understanding the mechanisms of cell locking, you empower yourself to maintain the accuracy and structure of your data. This ultimately enhances productivity and efficiency in your Excel usage. Now armed with this knowledge, you can confidently take control of your Excel worksheets. It will help you safeguard critical information and streamline your workflow for optimal results.
FAQs: How To Lock Cells In Excel
Q1: Why is it essential to lock cells in Excel?
A1: Locking cells in Excel is crucial to maintain data integrity and prevent unintended changes in specific areas of a spreadsheet. It ensures that critical information remains accurate and secure while allowing controlled editing in designated cells.
Q2: Can I lock only certain cells and leave others editable in Excel?
A2: Yes, Excel offers the flexibility to selectively lock or unlock cells. This guide explains how to choose which cells to lock, granting the ability to customize editing permissions based on your requirements.
Q3: How can I quickly lock or unlock multiple non-adjacent cells in Excel?
A3: To expedite the process of locking or unlocking non-adjacent cells, you can use the keyboard shortcut by selecting the cells and pressing F4 after applying the desired formatting using the Format Cells dialog.
Q4: Is there a way to protect the entire worksheet in Excel?
A4: Yes, Excel allows you to protect the entire worksheet to prevent any modifications. The guide covers the steps to protect the entire sheet and emphasizes the importance of securing your data.
Q5: What if I forget the password to unprotect a sheet in Excel?
A5: If you forget the password to unprotect a sheet, Excel does not provide an inherent way to recover it. It’s essential to keep a record of your passwords in a secure location to avoid such situations.
Q6: Can I change the protection settings for a protected sheet later?
A6: Yes, you can modify the protection settings for a protected sheet by unprotecting the sheet, making the necessary changes, and then protecting it again with the updated settings. The guide explains this process in detail.

