The technological advancement has created ease and brought changes in our ways of communication. From simple send/receive emails to importing the mailbox to one email client to another. In Microsoft Outlook, the data files (.pst) are saved on your computer. Hence, your Outlook data file PST can only be accessed on your computer. Whereas, in cloud technology, information stored in the cloud is easy to access by web-based services like Office365 (Microsoft 365), from anywhere by most devices, which makes it flexible and easy to manage. Since Office365 is a cloud-based service, a lot of organizations increasingly moving to the platform. But, they are confused over how to make the transition from MS Outlook data into Office 365, as they have huge volume of important data saved in Outlook data file (.pst).
There are various methods to import PST files to Office 365, but Network Upload method is one of the most common methods used by users. In this article, we will explain and guide you with Network upload process of importing PST files to Office 365 successfully. Also, you will discover software based alternative solution, with complete process, to directly import PST files to Office 365.
Method 1: Use Network Upload to Import PST files into Office 365
Network upload is one of the most common of the manual methods to import PST files to Office 365. It is Microsoft’s native method offered to the users for importing PST files to Office 365. The method is a little complex and requires high technical skills to execute the process successfully. If you know how the PowerShell commands work, then you can easily execute the process.
Phase 1: Assign Roles
However, before you begin the process of importing PST file to Office 365, first you need to assign Import Export and Mail recipient role to the user account. To do so, follow the steps given below:
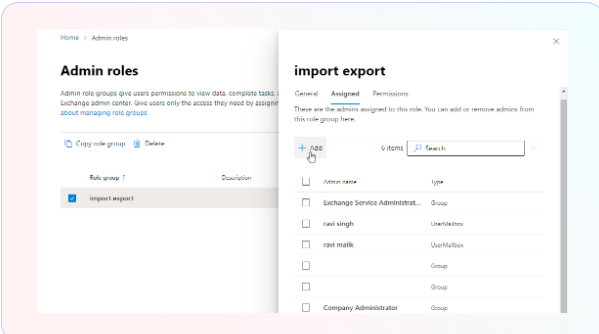
- Open Exchange Admin Center, and from the left-hand bar expand the ‘Roles’ and then click on ‘Admin Roles’.
- Under the ‘Role group’, select ‘import export’ and click.
- Now, from the extended page, select the ‘Assigned’ tab, and click on ‘+Add’. Select the user you want to assign the role of ‘Admin’ for PST import.

Phase 2: Create the Import Job
Before you can upload your PST files to Azure Storage location, you are required to download Azure AzCopy tool, a command-line tool, which facilitates the PST import to Office 365. Follow the steps given below go further in the process.
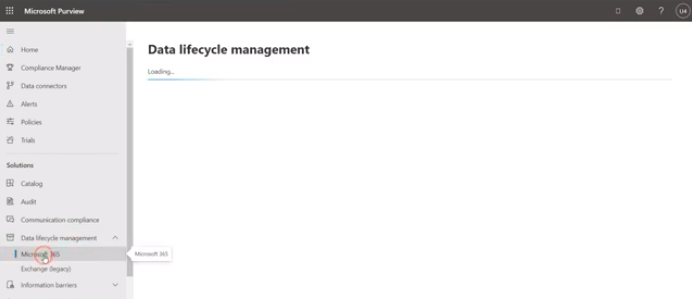
- Go to ‘Microsoft Purview Compliance Center’ www.compliance.microsoft.com, and navigate to Data lifecycle management from the left hand bar, expand and then click on Microsoft 365.
- From the Data lifecycle management page, click on the ‘Import’ button, and then click on ‘+New Import Job’.
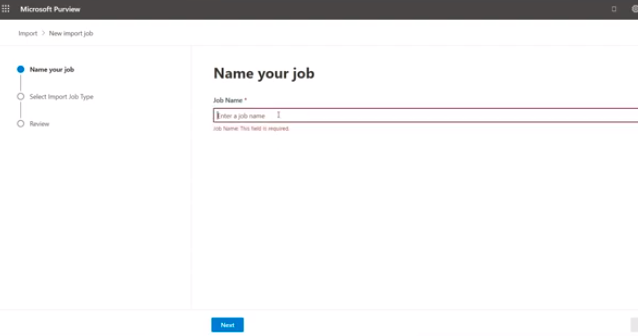
- This will open the ‘New import job’ wizard. Now under ‘Name your job’, enter the import ‘Job Name’, and then click ‘Next’.
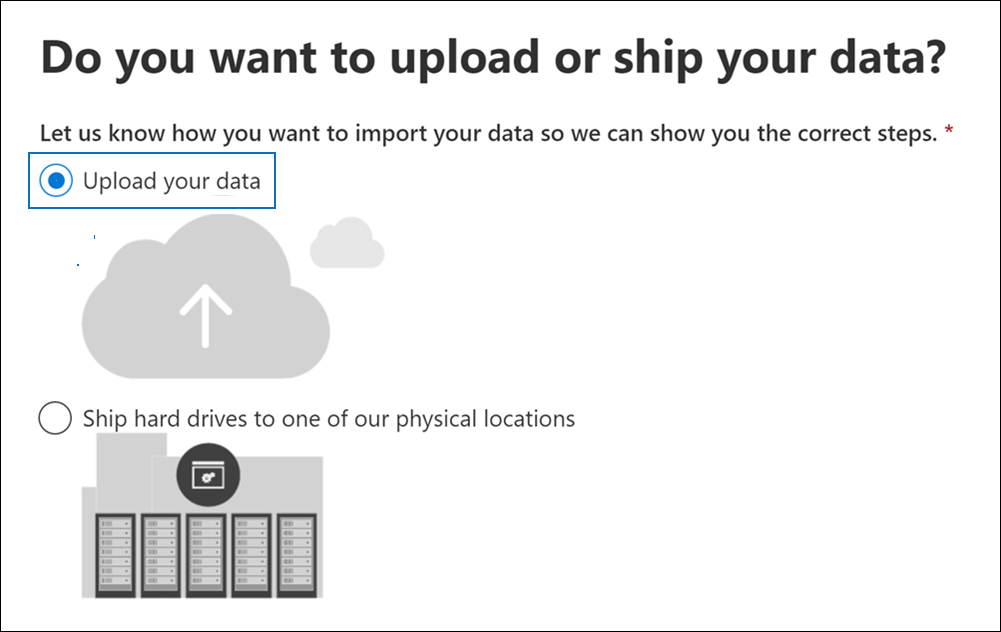
- In the ‘Select Import Job Type’ section, select ‘Upload your data’ from the given options and then click ‘Next’.
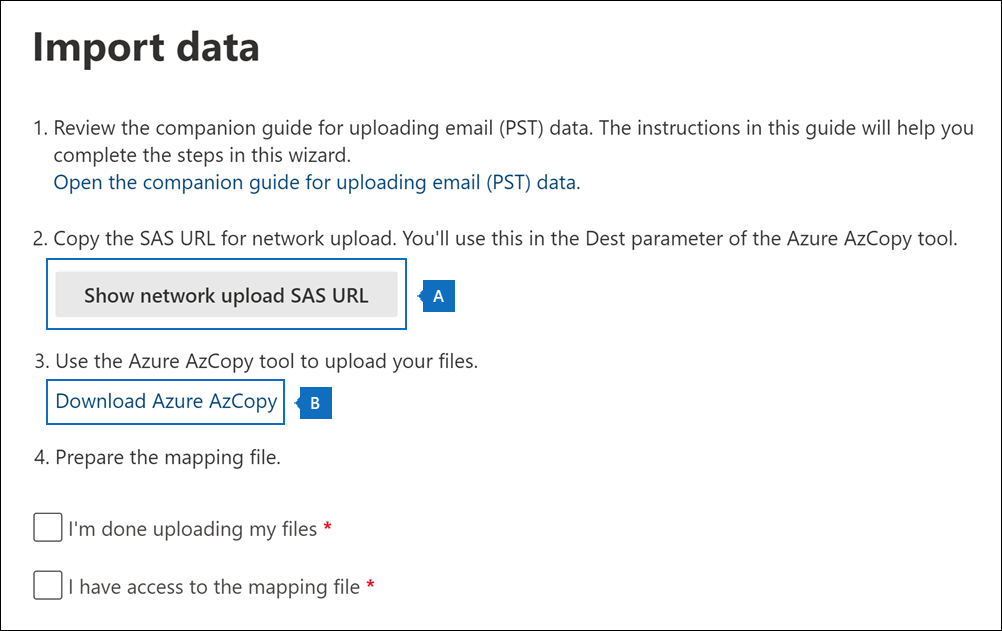
- It will take you to the ‘Import’ section of the wizard. From there, click on ‘Show network upload SAS URL’. It will download the URL. Now, click on ‘copy to clipboard’, and paste it on your notepad for later use.

Note: While creating the PST import Job, you cannot use spaces or uppercase letters.
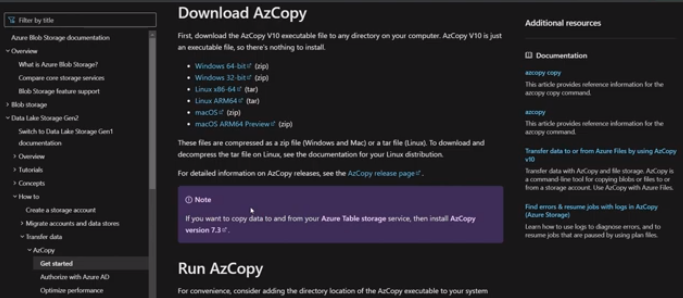
- Now, download Microsoft Azure AzCopy tool, by clicking on ‘Download Azure AzCopy, it will re-direct you to a new Microsoft page, click on ‘Windows 64 bits [zip]’, and it will download your ‘Azure AzCopy’ tool [command-line tool].
AzCopy tool facilitates uploading PST files to Office 365 [Microsoft 365]. The tool helps you to upload and store PST files in Azure Storage location in Microsoft cloud. It is located in the same regional Microsoft datacenter where your organization is located. Therefore, you can locate your PST file in a file share or file server of your organization or in Azure Storage location managed by your organization.
In Azure Storage location, PST storage location is called source location. Every time when you run the AzCopy tool, you can select a different source location or specify another source location.
Phase 3: Upload PST Files using Azure AzCopy tool
To initiate uploading of the Outlook PST files to Office 365 Azure Storage, follow these steps:
- Extract Azure AzCopy on your desktop, and also copy the folder with PST files on the desktop or connect the drive, if PST file is in your external drive.
- Open the Command Prompt, and locate the extracted folder (azcopy.exe file) which is on your desktop by using ‘cd’ command.
- Now, run the command “pathToFolder/ContainingPST” “SAS URL” –recursive=true, to upload the PST files to Azure Storage.
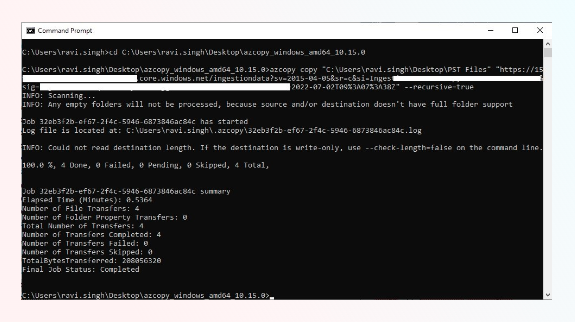
Note: In case, your PST files are saved in the subfolders as well then you can apply the –recursive=true switch to identify the recursive mode.
- Wait till PST files are uploaded. It may take some time, depending on network speed and bandwidth.
During the process, you need to ensure that the PST file does not exceed the limit of 20GB, as anything above 20GB may hamper the quality of import.
- Once the PST files are uploaded, then go back to Office 365 ‘import data’ section and check on ‘I’m done uploading my files’ and also ‘I have access to the mapping file’ (you will get a .csv file), and then click on ‘Next’.
- You will be transported to ‘Microsoft Purview’ page, where under ‘Select mapping file’ click on [+select mapping file] which is .csv file. Upload and ‘Validate’, and then click ‘Next’.
- This will successfully import the PST files to Office 365.


Method 2: Import PST files to Office 365 via Software Tool
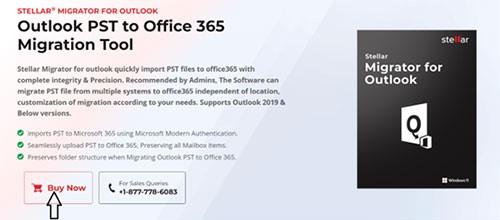
The manual method to import PST files to Office 365 using ‘Network upload’, facilitated by Microsoft is lengthy and requires high degree of technical knowledge. Therefore, users wanting to save time, as well as ease in importing PST files to Office 365 may use a specialized tool like Stellar Migrator for Outlook to migrate PST files to Office 365 efficiently.
It is effectively designed to allow users to simultaneously import multiple PST files, can be from different systems, to Office 365. The Stellar Migrator for Outlook also allows users to customize the migration procedure as per their requirements.
Follow the steps given below to import PST files into Office 365 efficiently while maintaining the structure and hierarchy of the folders.
- Go to the Official page of Stellar Migrator for Outlook and click on ‘Buy Now’. In the following page, enter the number of mailboxes you want to migrate.
- Once, the numbers are selected, click again on ‘Buy Now’ and complete the payment. You will receive ‘exe’ file in your email with ‘license credentials’ to install the tool.
- Now, install the tool by running the ‘exe’ file that you have received and downloaded.
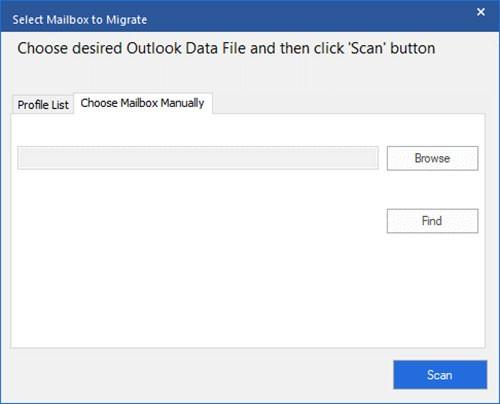
- Launch the ‘Stellar Migrator for Outlook’ after installation. From the interface, Browse and select the PST file manually that you want to migrate to Office 365.
- You can also click on ‘Profile List’ tab to view all the PST files associated with your profile on your computer.
- Once the PST files are selected, click ‘Scan’ button to initiate the scanning process.
- When the scanning is complete, you can view all the file items in the left panel. Now, expand the folder and you can preview its items.
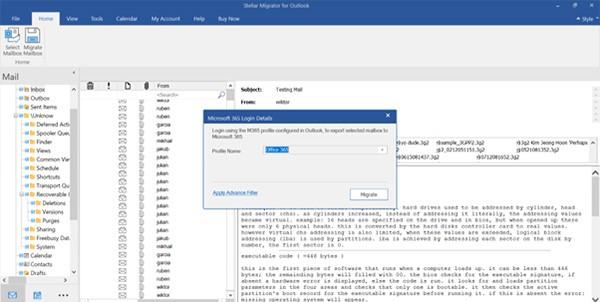
- Select the mail folders and items that you want to migrate, and then click Migrate Mailbox from Home tab. Now, the tool will display ‘Migrate Mailbox’ dialog box. Choose ‘Microsoft 365’ and then click on ‘Next’ to initiate the process. The tool will redirect you to the already configured Office 365 account.
- Enter Microsoft 365 credentials, and click on ‘Migrate’. It will connect to the Office 365 using Microsoft Modern Authentication and start moving your selected mail items.
- Wait until the process is completed. It may take time depending upon the file size and network speed. Once the PST import to Office 365 is successful, you will receive a message ‘Mailbox successfully moved to Office 365’. Click OK to end the process.


Conclusion: Importing PST files to Office 365 using Network upload method can be really tiring due to its length. Moreover, this method of migrating PST files to Office 365 requires a good set of technical knowledge. However, you can still import PST files to Office 365 by employing software-based quick and reliable solution, like Stellar Migrator for Outlook, which can manage your PST migration to Office 365 efficiently.
The migrator tool offers some effective and beneficial features like, direct upload, maintains file structure and integrity, advance filters, enhanced preview, flexible and scalable, and much more. These incredible features give you immense advantage in importing your PST files to Office 365.