This is not easy in an era where techies are fighting to maintain increasingly large media, app, and dev stacks. For power users, a 4-bay Network Attached Storage (NAS) device that hits the Goldilocks zone for capacity, performance, and expandability. Most enthusiasts purchase powerful storage arrays, but few get to utilize their full power. This is the ultimate guide to fine-tuning your 4-bay NAS, covering everything from the complexities of RAID to your options for fast, easy, yet resilient configurations, right the way through to performance tuning to get maximum throughput out of it. From home media servers to development environments to tech labs, here is everything you need to know about optimisations. From basic server configurations to advanced cases where advanced communication and computing processes are needed, all in combination with the ability to exercise complete control over your data, in this series we will break through the technical depth of customization possibilities like virtualization capabilities and network optimization techniques to equip you with the knowledge needed to transform your NAS into nothing less than a high-performance baller that knows not just storage, but data management.
Understanding NAS 4-Bay Fundamentals
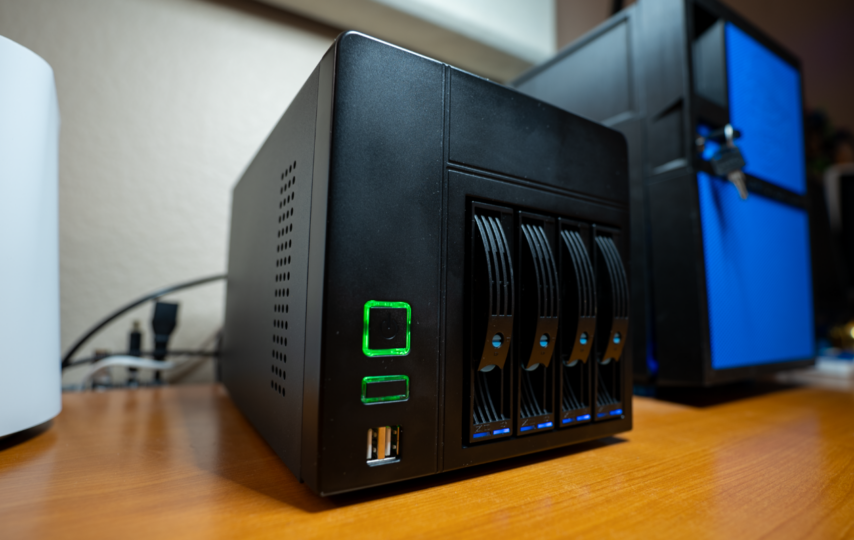
The 4-bay NAS is the sweet spot between consumer and enterprise storage, giving the tech enthusiast an incredible amount of flexibility. With four drive bays for standard 3.5″ or 2.5″ HDDs, the system can support a total raw capacity of up to 96TB with HDDs alone. Adding M.2 SSDs can push the total capacity to 112TB. A 4-bay system like the UGREEN NA series provides just the right amount of features and expandability without being as expensive as bigger enterprise class systems or as limited as smaller 2-bay so the redundancy options come at a reasonable cost.

At the core of any modern 4-bay NAS is a dual or quad-core processor combined with upgradeable RAM, from 2GB (in cheap models) through to as much as 32GB (in the top-end models). This is vital for dealing with multiple flocks of data, creating virtual computers or orchestrating Docker containers. All but the very basic models have dual gigabit Ethernet ports for connecting to a network, with more premium models 10GbE-ready for workflows that need it.
In the home lab, 4-bay NAS platforms will be at home be it for media streaming, backup utility, development environments or even private clouds. Their ability to run multiple services at the same time is matched by their ability to maintain data integrity through various RAID configurations, making them essential forces in tech hobbyists needs with solid, always-on storage that doesn’t require the complexity of full-fledged enterprise systems.

Optimizing RAID Configuration for Data Redundancy and Performance
RAID Levels Demystified
Knowing different types of RAID configurations is key to making the most of your 4-bay NAS. Maximum speed comes from RAID 0, which stripes data across multiple drives with zero redundancy. RAID 1 mirrors data—each piece of data gets written to two drives in pairs, meaning the best possible protection but half of your capacity available. RAID 5 combines performance and redundancy by striping data with parity information, requiring one drive for redundancy. The combination will deliver the best performance and redundancy (RAID 10, or RAID 1+0) but requires four drives. JBOD is just concatenation of drives into one volume without any redundancy.
Choosing the Right RAID Setup
RAID 5 gives the best balance of usable capacity and single drive failure protection, making it a great choice for media streaming and general storage. RAID 10 provides better performance in writes and redundancy for development environments. For heavy content creators, RAID 0 with another solution for backup is the fastest option. RAID 5 also provides 24TB of usable space with four 8TB drives, but if you want more performance, you can get 16TB with RAID 10.
Step-by-Step RAID Implementation
Do a backup of any existing data to an external device prior to configuring RAID. Usually, open your NAS management side and browse the storage manager. Format new drives and choose the RAID level you want. Then you enable write-cache if applicable for increased performance. Set up e-mail messages for drive health alerts. Perform weekly RAID consistency checks at non-peak time. Check drive temperatures and health status in your NAS dashboard. Also, have spare drives available for immediate replacement of the failed units. Routine maintenance will optimally perform and protect data.

Enhancing NAS Performance for Demanding Workloads
Hence, we need to find out the hardware and software optimization that can maximize your 4-bay NAS performance. SSD caching is an effective way to improve your overall system without much effort, as it takes frequently used data and moves it to the much quicker solid-state drive (SSD). The read-write cache achieved with dual SSDs is the best possible scenario — it features fast read and write operations and can be used, for example, by databases or as a host for virtual machines. They offer roughly an order of magnitude more throughput vs. conventional gigabit links, but link aggregation can aggregate several gigabit ports into a virtual 10GbE link at a fraction of the cost.
For memory-intensive applications such as Plex Media Server transcoding or running numerous Docker containers, you can achieve a substantial boost in performance with RAM upgrades. Minimum of 8GB (basic operation) and 16-32GB or more for virtualization workloads. Additional performance gains can be reapplied via application-specific tuning; for example, adjusting Plex transcoding settings or SMB protocol parameters.
Use built-in NAS monitoring tools to measure improvements, and test specific components of your network with dedicated benchmarking utilities such as CrystalDiskMark for storage performance and iperf3 for testing network throughput. By regularly monitoring performance, you can proactively identify potential bottlenecks and validate your optimization efforts, ensuring your NAS meets peak efficiency under varying workloads.
Advanced Customization and Scalability Options
Expand and customize your 4-bay NAS like a Pro! External expansion units couple to your base system through an external interconnect, and add up to 8 drive bays for the cost of an expansion unit rather than an entirely new NAS. This scalability is crucial as storage requirements exceed your original configuration. Repeat with expansion unit drives that are certified to the specifications of your existing drive array for best performance.
Virtualization features allow you to turn your NAS into a full-on lab environment. Modern NAS systems can run most popular hypervisors like VMware and Virtual Box smoothly, allowing for multiple test beds and dev sandboxes. Support for Docker containers makes it easier to deploy your applications, and there are tools such as the Portainer application which simplify working with containers. Resource quota and dedicated interface for across virtual instance ensure stability.
Important Note: Security should be the first priority when adding features to the NAS. Leveraging the LDAP integration, you can set up granular permissions for users as per their roles. The same thing is accomplished through two-factor authentication and SSL certificates that enable remote access to systems. Enthusiast users can play with modded firmware and third-party apps via package managers, but do your research on compatibility to avoid ruining the system. Regular security audits and automated backup routines protect your expanded NAS ecosystem from potential vulnerabilities.

Transforming Your 4-Bay NAS into a High-Performance Hub
The 4-bay NAS is a solution fit for plenty for those who want storage tools worthy of a professional without enterprise complexity. By configuring RAID properly, optimizing performance, and customizing these systems at a deep level, they become robust data management hubs. With the choice between RAID 5 for balanced protection or RAID 10 for peak performance, your storage array adapts to your particular workflow requirements. Monitoring system performance and health, including regular RAID consistency checks and drive health checks, protects your data and ensures the system is performing at its peak. Your NAS transitions from mere storage to a comprehensive platform for development, media streaming, and private cloud services through SSD caching, optimized network connectivity, and virtualization functionality. Expansion options and scalability features future-proof your investment because storage needs always grow. It’s the time where you can take action on it by optimizing it, learn from it and maximize the use of your 4-bay NAS system.